 how-to
How to Inspect Rental Trailer Straps (2026 Guide)
Table of Contents
- Why You Must Inspect Rental Trailer Straps First
- What You'll Need for a Thorough Inspection
- Step 1: Read the Working Load Limit and Condition Tags
- Step 2: Check the Webbing for Signs of Damaged Ratchet Straps
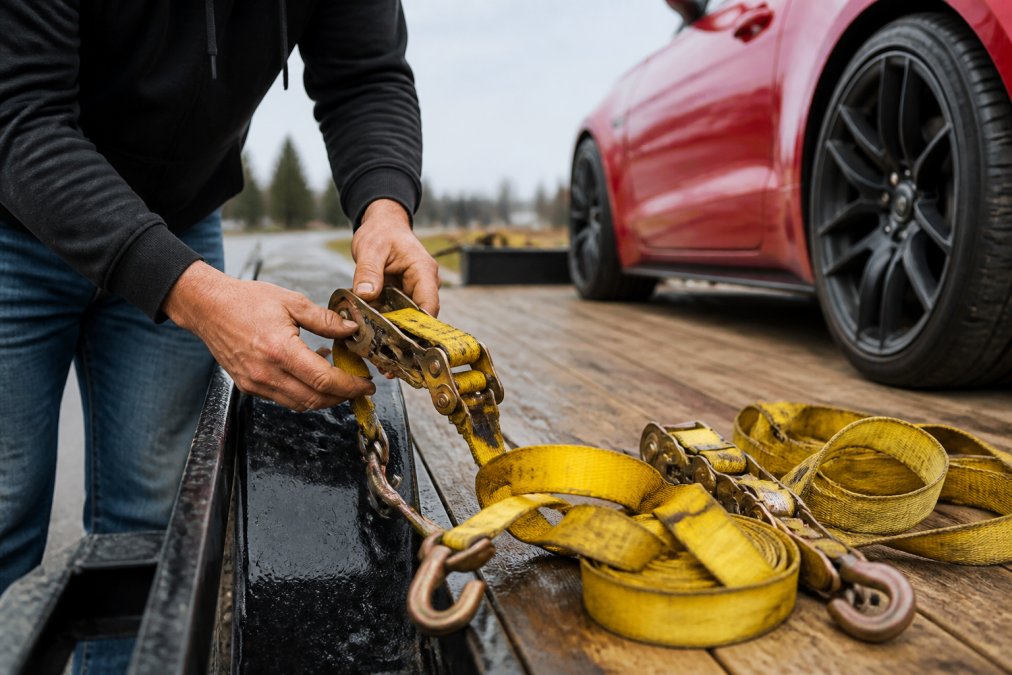
- Step 3: Examine Hardware and Ratchet Mechanism
- Step 4: Know the FMCSA Cargo Securement Rules for Straps
- Step 5: How to Properly Secure a Car on a Trailer
- Rental vs. Owned Straps: What to Document
- Frequently Asked Questions
Last Updated: September 4, 2026
Why You Must Inspect Rental Trailer Straps First
Rental trailer straps are the single point of failure between your vehicle and the road, yet most renters never look at them before driving away. A strap that looks fine at the lot can fail at highway speed when a load shifts, causing thousands in damage.
When you rent a trailer, you inherit the wear and tear of every previous user with no history of how the straps were stored, loaded, or abused. The FMCSA holds the driver responsible for securement, meaning a failed strap is your liability, not the rental company's.
A thorough inspection takes less than five minutes once you know what to look for. This guide covers webbing condition, hardware integrity, load ratings, and the legal standards that apply.
What You'll Need for a Thorough Inspection
A proper inspection of rental trailer straps requires minimal tools, most of which you likely carry already. Gather these items before you begin:
- A bright flashlight or your phone light for examining webbing in shadowed areas
- A pair of work gloves to protect your hands from frayed fibers and sharp edges
- Your phone camera to document any damage you find for the rental agreement
- A tape measure or ruler to check webbing width against the load rating tag
Gloves matter because damaged webbing hides sharp fibers that can slice skin, and rusted hardware can have jagged edges. The flashlight is equally important because UV damage and chemical contamination often appear on the underside of the strap.
If you find damage, photograph it immediately and show the rental staff before you leave. This protects you from being charged for pre-existing wear and creates a record in case of a dispute later.
Step 1: Read the Working Load Limit and Condition Tags
Every tie-down strap carries a label stating its working load limit (WLL), the maximum force the strap is rated to handle during normal use. This tag tells you whether the strap is even rated for your vehicle's weight.
Look for the WLL printed on the sewn-in label, typically located near one of the hooks. The label also shows the strap's length, width, and the manufacturer's name. Cross-reference this number against your vehicle's actual loaded weight with fuel, cargo, and occupants.
Rental fleets often mix straps from different manufacturers, and one strap in the set may have a lower WLL than the others. The weakest strap determines your maximum securement capacity, so check every label.
Step 2: Check the Webbing for Signs of Damaged Ratchet Straps
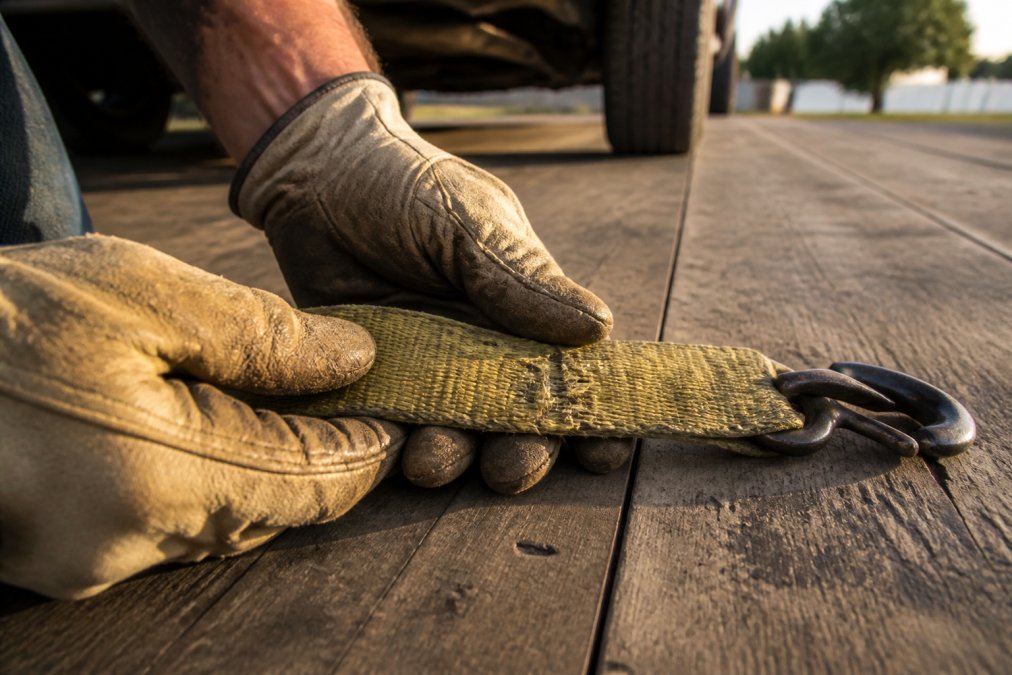
Damaged ratchet straps show their problems in the webbing long before the hardware fails. Run the strap through your gloved hands from hook to hook, examining both sides under your light. Divide the webbing into three zones, the hook end, the middle run, and the ratchet end.
Look for these specific damage indicators:
- Fraying and cuts: Broken fibers along the edges or across the face weaken the strap's tensile strength. Any cut deeper than the surface layer is a retirement candidate. Run your thumb along both edges; even a single broken filament that catches your skin is a warning sign. Edge wear is the most common failure point.
- UV degradation: Sun-damaged webbing appears faded, chalky, or stiff. A strap that was once bright red or yellow but now looks pink or cream has lost a significant portion of its tensile strength. UV damage is cumulative and irreversible, penetrating the entire width of the webbing.
- Chemical contamination: Stains from oil, fuel, battery acid, or solvents break down the fibers. A strap that smells of chemicals or shows discoloration should not be used. Chemical damage is insidious because the fibers may look intact while the internal polymer chains have been severed. Pay special attention near the hooks.
- Stitching failure: Check the sewn loops where the webbing attaches to the hardware. Loose threads, gaps, or missing stitches mean the connection can pull apart under load. A proper tie-down uses a box-and-X stitch or a bartack pattern; a straight line of stitches suggests improper repair or a counterfeit.
A healthy strap has minimal stretch when pulled taut. If the webbing feels overly elastic or springs back slowly, the synthetic fibers have degraded and the strap will stretch under load. This is especially common in polyester webbing exposed to high heat.
Measure the webbing width at three points: near the hook, in the middle, and near the ratchet. If the strap has narrowed by more than 1/8 inch in any section, the fibers have been overstretched or abraded, and the rated capacity is no longer valid.
Step 3: Examine Hardware and Ratchet Mechanism
Hardware integrity is just as important as webbing condition. The hooks, ratchets, and attachment points carry the same load as the strap itself; corrosion or deformation here causes sudden, catastrophic failure.
Begin with the hooks. Look for cracks, bends, or deformation in the hook shape. A hook stretched open under a heavy load will not grip the trailer frame properly and can slip off during transit. Check the latch or safety clip on any locking hooks.
Test the ratchet by threading the strap through and cranking it tight. It should engage smoothly with each click and hold tension without slipping backward. Listen for grinding or skipping, which indicates worn internal gears. Check the release lever to confirm it opens fully.
Surface rust on hardware is cosmetic, but pitting, flaking, or rust that has penetrated the metal weakens the component. Pay special attention to the rivets and welds where the ratchet attaches to the frame, since these stress points fail first when corroded.
Step 4: Know the FMCSA Cargo Securement Rules for Straps
The FMCSA sets the legal minimums for cargo securement, and these rules apply to rental trailers just as they do to commercial fleets. Understanding the basics helps you comply with the law and secure your load properly. The FMCSA cargo securement regulations specify how tie-downs must be used, including minimum number of straps and their placement.
The FMCSA rules are codified in Title 49 of the CFR, Part 393.100 through 393.136. For a passenger vehicle on a trailer, the relevant sections are 393.102 (minimum strength requirements) and 393.110 (tie-downs for vehicles). These rules apply to any vehicle with a GVWR over 10,000 pounds operating in interstate commerce.
Here is the specific breakdown of what the law requires for a vehicle on a trailer:
- Minimum number of tie-downs: A vehicle over 10,000 pounds GVWR requires at least four tie-downs. A vehicle under 10,000 pounds requires two tie-downs if it is less than 10 feet long and the aggregate working load limit (WLL) meets the strength requirement. Most passenger cars fall into this lighter category, but the four-tie-down rule is the safer default for any vehicle.
- Aggregate strength requirement: The combined WLL of all tie-downs must be at least half the weight of the cargo. For a 5,000-pound car, you need straps whose combined WLL is at least 2,500 pounds. Two straps rated at 1,500 pounds WLL each satisfy this requirement, but two straps rated at 1,000 pounds each do not. This is a hard legal minimum, not a recommendation.
- Attachment points: Tie-downs must attach to the vehicle's frame, axle, or manufacturer-designated tie-down points. Attaching to bumpers, body panels, or suspension components is a violation and is unsafe because those components are not designed to carry securement loads.
- Direction of restraint: The FMCSA requires that tie-downs restrain the cargo in the forward, rearward, and lateral directions. This is why crossed straps are not just a best practice, they are the mechanism by which you achieve lateral restraint. A strap that runs straight forward and another that runs straight backward do not prevent side-to-side movement.
A roadside inspection can include a cargo securement check, and violations are cited under the North American Standard Out-of-Service Criteria. A strap that is frayed, cut, or has a missing label can result in an out-of-service order. Fines typically range from $100 to $500 per violation, and repeated violations can escalate to thousands of dollars.
The FMCSA rules also require that tie-downs be "properly tensioned" at the start of the trip and re-tensioned as needed during transit. The practical standard is that the strap should be tight enough that the vehicle's suspension does not bounce freely.
If a strap fails during your trip, the FMCSA rules establish a clear standard of care. If you can document that the strap was damaged before you left the lot and you flagged it to the rental company, you have a strong case that the failure was not your negligence. If you did not inspect and the strap was visibly worn, you will likely be held responsible.
Step 5: How to Properly Secure a Car on a Trailer
Securing a car on a trailer follows a sequence that distributes load evenly and prevents movement in every direction. The process starts with the trailer positioned on level ground and the parking brake engaged.
Position the vehicle so its center of gravity sits slightly forward of the trailer axle. This transfers weight to the hitch and prevents trailer sway at speed. Once positioned, chock the wheels front and rear on at least one axle.
Attach the straps to the vehicle's designated tie-down points. Most cars have reinforced slots or loops on the frame near each wheel. Never hook straps to suspension arms, control arms, or steering components, as these can move during transit and loosen the straps. For vehicles without factory tie-down points, use wheel straps.
Tighten the straps in a crossing pattern. The front straps should pull the vehicle forward and down, while the rear straps pull backward and down. This opposing tension locks the suspension and prevents bouncing. Crank each ratchet until firm, then give one final pull to seat everything.
Rental vs. Owned Straps: What to Document
Rental straps carry different risks than owned equipment because you cannot know their service history. They may have been overloaded, left in the sun for months, or stored improperly.
Photograph each strap showing its condition and the load rating tag. Note any existing fraying, rust, or damage on the rental agreement before you sign. This protects you from liability for pre-existing wear and gives you recourse if a strap fails despite passing your inspection.
Ask the rental company about their replacement policy. A reputable operation replaces straps on a schedule or after visible damage.
Rental trailer straps protect thousands of dollars of your property, yet they receive less scrutiny than the trailer itself. A five-minute inspection before every trip is cheap insurance against a highway failure.
Frequently Asked Questions
What are the legal requirements for using trailer straps?
The FMCSA cargo securement rules require that all tie-downs, including rental trailer straps, meet specific working load limits and be free of damage. For vehicles under 10,000 pounds, you must use a minimum of two tie-downs, and each strap must be attached to a secure anchor point on the trailer. The rules also prohibit using straps with cuts, fraying, or broken stitching because they reduce the strap's tensile strength below its required rating.
What is the item most commonly overlooked during a pre-trip inspection?
The ratchet mechanism's release handle is the most commonly missed item. Renters check the webbing but ignore the hardware. A stuck or bent release handle prevents proper tension, and a cracked ratchet pawl can fail under load. Always test the ratchet fully open and closed before loading your car, and confirm the tension release works smoothly. Also check the hook throat for bends, since a deformed hook won't seat correctly on the trailer rail.
How do I identify the Working Load Limit (WLL) on rental straps?
Every compliant tie-down strap has a sewn-in label stating the Working Load Limit (WLL). On rental trailer straps, this tag is usually located near the ratchet or stitched into the loop end. The FMCSA requires the WLL to be permanently marked and legible. If the label is missing, faded, or torn, do not use the strap. Ask the rental company for a replacement immediately, as you cannot verify the strap meets the minimum load capacity required for your vehicle.
When should you retire a ratchet strap from service?
Retire a ratchet strap immediately if you find frayed fibers, cuts deeper than the edge, UV degradation shown by faded or brittle webbing, or any broken stitching. Also retire it if the ratchet handle is bent, the pawl slips, or the hooks show deformation or rust. Chemical contamination, such as battery acid stains, weakens synthetic fibers even if the strap looks otherwise fine. When in doubt, do not use it and request a different strap from your rental provider.
Securing your vehicle properly starts with equipment you can trust. 402 car hauler rentals provides dependable trailers with flexible terms for hauling everything from project cars to race vehicles across the Omaha area. Our fleet is maintained so you can focus on the road, not on worrying about your straps. Contact us to book your next transport job with confidence.
Frequently Asked Questions
Q: What are the legal requirements for using trailer straps?
A: The FMCSA cargo securement rules require that all tie-downs, including rental trailer straps, meet specific working load limits and be free of damage. For vehicles under 10,000 pounds, you must use a minimum of two tie-downs, and each strap must be attached to a secure anchor point on the trailer. The rules also prohibit using straps with cuts, fraying, or broken stitching because they reduce the strap's tensile strength below its required rating.
Q: What is the item most commonly overlooked during a pre-trip inspection?
A: The ratchet mechanism's release handle is the most commonly missed item. Renters check the webbing but ignore the hardware. A stuck or bent release handle prevents proper tension, and a cracked ratchet pawl can fail under load. Always test the ratchet fully open and closed before loading your car, and confirm the tension release works smoothly. Also check the hook throat for bends, since a deformed hook won't seat correctly on the trailer rail.
Q: How do I identify the Working Load Limit (WLL) on rental straps?
A: Every compliant tie-down strap has a sewn-in label stating the Working Load Limit (WLL). On rental trailer straps, this tag is usually located near the ratchet or stitched into the loop end. The FMCSA requires the WLL to be permanently marked and legible. If the label is missing, faded, or torn, do not use the strap. Ask the rental company for a replacement immediately, as you cannot verify the strap meets the minimum load capacity required for your vehicle.
Q: When should you retire a ratchet strap from service?
A: Retire a ratchet strap immediately if you find frayed fibers, cuts deeper than the edge, UV degradation shown by faded or brittle webbing, or any broken stitching. Also retire it if the ratchet handle is bent, the pawl slips, or the hooks show deformation or rust. Chemical contamination, such as battery acid stains, weakens synthetic fibers even if the strap looks otherwise fine. When in doubt, do not use it and request a different strap from your rental provider.