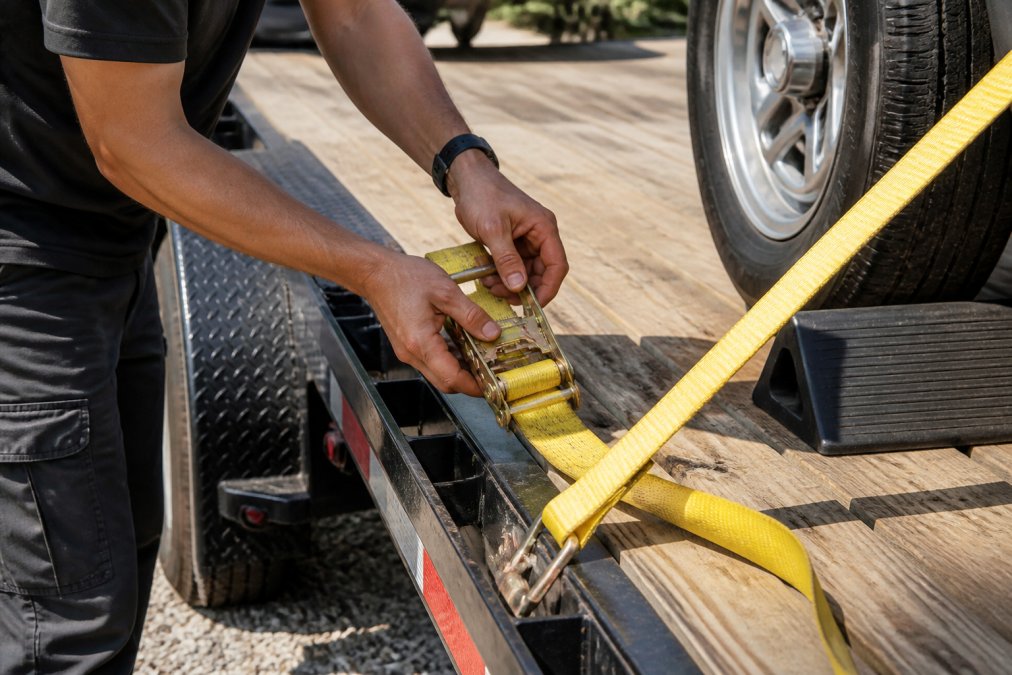
 how-to
Maintaining Trailer Straps and Tire Stops: 2026 Guide
Table of Contents
- Why Trailer Straps and Tire Stops Fail at the Worst Time
- What You'll Need Before You Start Inspecting
- How to Inspect Ratchet Straps for Fraying and Wear
- When to Replace Trailer Tire Chocks and How to Check Them
- DOT Requirements for Trailer Tie-Downs: What You Must Know
- How Often Should You Inspect and Maintain Your Straps and Chocks?
- Common Mistakes That Shorten the Life of Trailer Straps and Tire Stops
- Frequently Asked Questions
Last Updated: September 14, 2026
Why Trailer Straps and Tire Stops Fail at the Worst Time
Most tie-down failures don't happen because the strap was weak. They happen because nobody looked at it until the load was already moving. Maintaining trailer straps and tire stops is the least glamorous part of hauling a car, and it's the part that decides whether your project car arrives at the show or ends up on the shoulder of the interstate. At 402 car hauler rentals, we understand the importance of well-maintained equipment.
The failure points are predictable. Webbing frays where it rubs the trailer deck edge. Ratchet pawls seize from road grit and never get lubricated. Tire stops crack at the base weld or lose their grip surface after a few seasons in the sun. None of these fail overnight. They degrade slowly, and they give you plenty of warning if you know what to look for.
This guide walks through the full inspection routine: what to check, how to test it, and how often to do it.
What You'll Need Before You Start Inspecting
You need four things: work gloves, a bright flashlight, a rag, and a hard, flat surface to lay the straps out on.
Gloves matter because frayed webbing can slice a palm, and you'll be handling greasy ratchet hardware. The flashlight is for the underside of the webbing and the inside of the ratchet housing, where the damage actually hides. A rag lets you wipe grit off the pawl and spring so you can see whether the mechanism is worn or just dirty. Laying each strap flat on the ground or a workbench is the only way to spot edge wear, twist memory, and stitch damage that disappears when the strap is coiled.
Set aside 15 to 20 minutes for a full set. Working through a stack of straps in a hurry is how you miss the one that's about to fail.
How to Inspect Ratchet Straps for Fraying and Wear
Start with the webbing, because that's where most failures begin. Run the full length of each strap through your gloved hands, feeling for rough patches, thinning, and hard spots. Then lay it flat and look at it under good light.
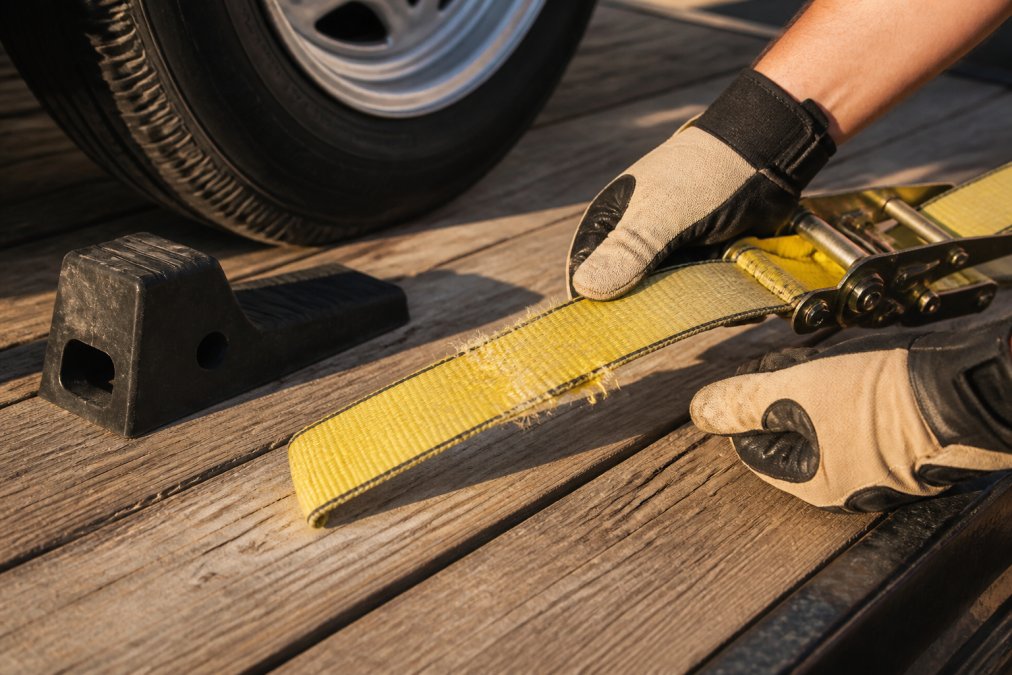
Checking the Webbing, Stitching, and Hardware
The webbing is the load-bearing member, and it fails in specific places. Check these:
- Edge cuts and abrasion: Any cut, gouge, or fuzzy edge along the length. Damage at the deck contact point is the most common finding.
- UV degradation: Webbing that's faded, stiff, or chalky has lost strength to sunlight. If it cracks when you fold it sharply, it's done.
- Stitching: Look at the sewn loops at both ends. Broken or pulled stitches, loose thread, or a loop that's stretched out of shape means the strap is compromised.
- Hardware: Check the hooks for bends, cracks, and a working spring gate. A hook that's been straightened after bending is no longer trustworthy.
Testing the Ratchet Mechanism Under Load
A ratchet that clicks freely in your hand can still slip under tension. Test it properly: hook one end to a fixed point, run the strap through the mandrel, and crank it down until you feel real resistance. The pawl should engage with a solid click on every stroke and hold without slipping when you release the handle.
Watch for these signs the mechanism is finished:
- The handle travels without engaging the pawl
- The pawl skips teeth under tension
- The release lever sticks or won't fully disengage
- The mandrel wobbles or the housing is cracked
If the ratchet holds but feels gritty, clean the pawl and spring with a rag and a light application of oil. If it still skips, replace the assembly. Ratchet hardware is not a repair item.
When to Replace Trailer Tire Chocks and How to Check Them
Replace a tire chock the moment it shows a crack, a bent frame, or a worn-away grip surface. Chocks are cheap compared to the damage a rolling trailer causes, and there's no safe way to patch one that's structurally compromised.
Inspection is quick. Look at four things:
| Check | What to Look For | Action |
|---|---|---|
| Body and welds | Cracks, bends, rust-through at the base | Replace |
| Grip surface | Worn smooth, missing rubber pad, hardened | Replace |
| Fit against tire | Gaps, rocking, doesn't seat fully | Resize or replace |
| Weight rating | Unreadable or below your load | Replace |
The fit check is the one people skip. A chock that doesn't seat firmly against the tire tread does nothing, no matter how heavy it is. Set it in place, push the trailer gently, and confirm the chock stops movement instead of sliding.
DOT Requirements for Trailer Tie-Downs: What You Must Know
The Federal Motor Carrier Safety Administration sets the cargo securement rules that apply to commercial operation, and its guidance on tie-downs is worth reading directly: FMCSA cargo securement overview. The core principle is simple. Cargo must be secured so it cannot shift, and the working load limit of your tie-downs has to be adequate for the weight you're carrying.
For a car hauler, that means four-point tie-down at minimum, with straps rated for the load and attached to the vehicle's frame or designated tie-down points, not to sheet metal or suspension components (fmcsa.dot.gov). Inspect your securement before every trip, not once a season.
Even if you're hauling a personal vehicle and not operating commercially, the same rules are a sensible standard. A load that shifts at highway speed doesn't care whether you're running a business.
How Often Should You Inspect and Maintain Your Straps and Chocks?
Inspect before every trip and do a full teardown inspection monthly. That's the short answer.
The pre-trip check is a two-minute walk-around: confirm every strap is tight, every ratchet is engaged, and every chock is seated. The monthly inspection is the full routine in this guide, done on a bench with good light and time to look properly.
Replace on condition, not on a calendar. A strap that's been stored indoors and used lightly may last years. A strap that lives on an open trailer in the sun may need replacing in a single season. Judge the gear, not the date.
Common Mistakes That Shorten the Life of Trailer Straps and Tire Stops
The biggest mistake is over-tightening. Cranking a ratchet until the webbing is drum-tight stretches the fibers and shortens the strap's life. You want firm and secure, not maximum force.
Other frequent errors:
- Storing straps in the sun. UV is the number one killer of webbing (osha.gov). Keep them covered or indoors.
- Dragging straps over sharp edges. Always protect the contact point with an edge guard or a sleeve.
- Leaving ratchets uncleaned. Road grit wears the pawl and spring. A quick wipe and light oil after each trip adds years.
- Using the wrong chock for the tire size. A chock that doesn't match the tread curve won't hold.
- Mixing straps of different ratings. If you're not sure what a strap is rated for, don't use it on a loaded trailer.
A common mistake is treating tie-down gear as permanent equipment. It's a wear item, like brake pads. Budget for replacement and you'll never be caught short.
Tie-down gear is only as good as the last time you looked at it, and a rental trailer is only as good as the operator who maintains it. At 402 car hauler rentals, we offer reliable trailer rentals with flexible booking terms and competitive rates, suitable for various hauling needs from project cars to race vehicles. If you'd rather spend your time on the car than on the gear, get started with 402 car hauler rentals and put a dependable trailer behind your next haul.
Frequently Asked Questions
How often should I inspect trailer ratchet straps for wear?
Inspect your trailer straps before every trip and do a thorough check monthly. Look for fraying, cuts, or stiffness. If you haul frequently or in harsh weather, inspect weekly. Replace any strap showing deep abrasions or broken stitches immediately, as these can fail under load.
What are the signs that a trailer strap needs to be replaced?
Replace a trailer strap if you see fraying that exposes inner fibers, cuts longer than a quarter inch, or stiff, brittle webbing. Also check for rusted or bent ratchet hardware. If the strap has been in an accident or overloaded, replace it. When in doubt, swap it out, as a failed strap can cause serious damage.
Are tire stops necessary when hauling a vehicle on a trailer?
Yes, tire stops or chocks are critical for keeping a vehicle from rolling during transport. They prevent forward and backward movement, especially on inclines. Even with straps secured, chocks add a layer of safety. Check them for cracks, bends, or missing rubber pads before each use, and replace worn ones promptly.
What do DOT requirements say about trailer tie-downs?
The DOT requires that cargo be secured to prevent shifting. Inspect all tie-downs for damage before each trip, and ensure they meet the current Federal Motor Carrier Safety Administration (FMCSA) standards.